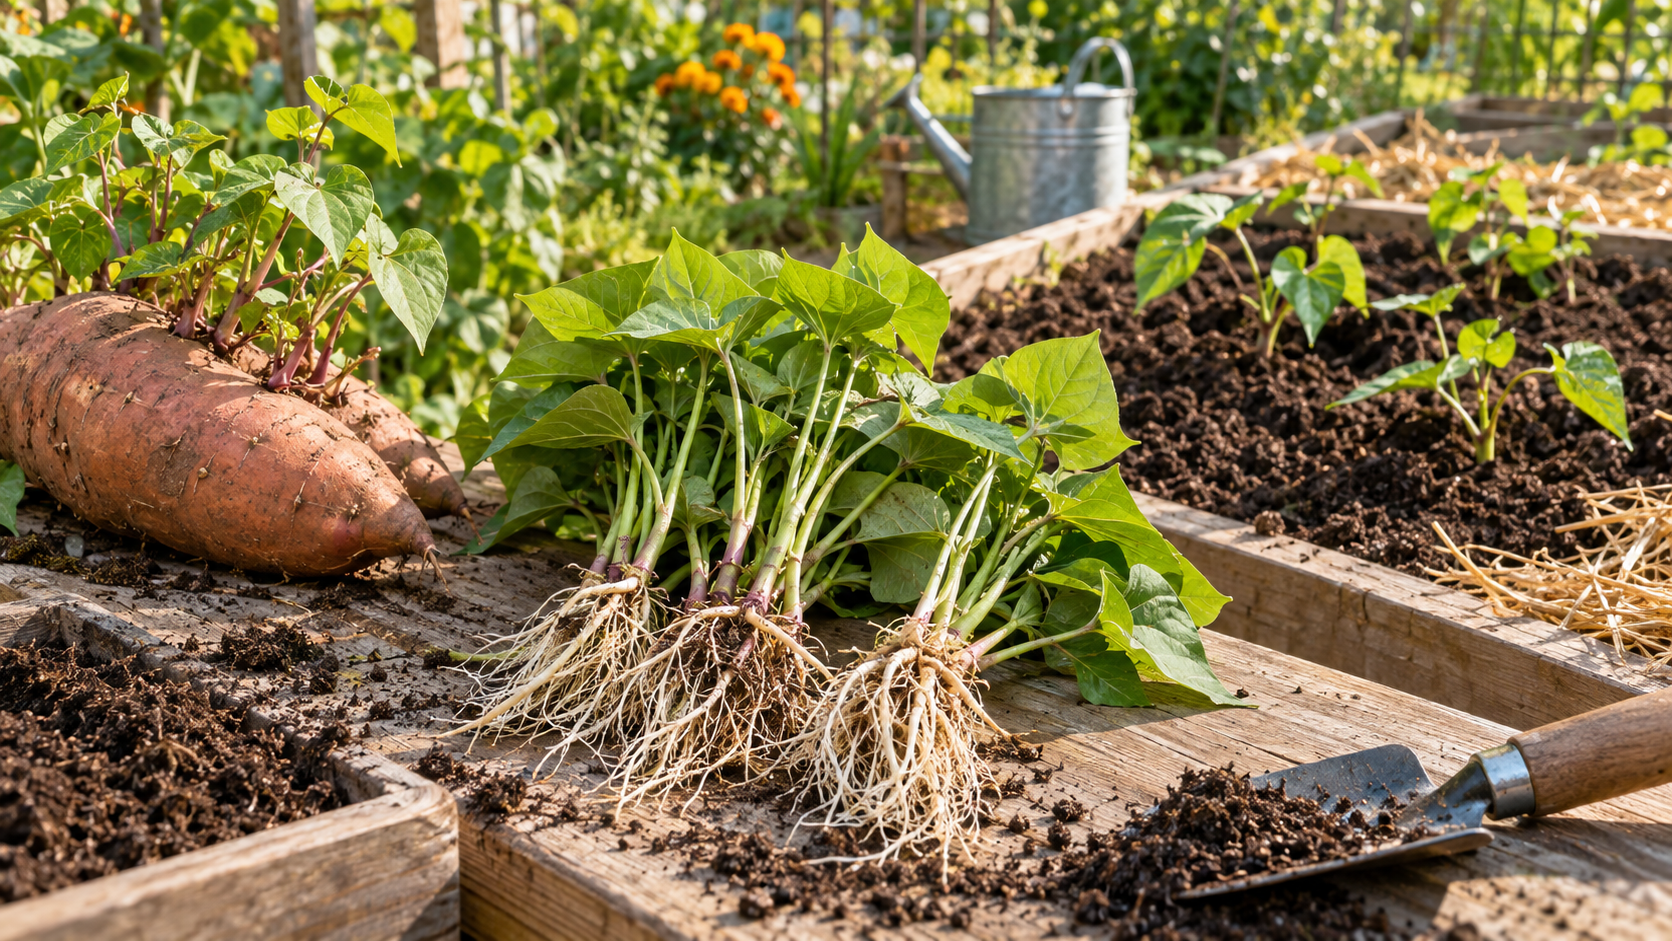
This complete guide explains how to prepare sweet potato slips for planting in nine practical steps. You will learn how to choose healthy starting material, encourage shoots, root slips, harden them off, prepare the garden, transplant correctly, and care for the vines until harvest.
If you are developing a vegetable garden, browse the Patch Plants Outdoor Plants guides. For general troubleshooting, keep our Plant Care guides available throughout the growing season.
QUICK ANSWER
How Do You Grow Sweet Potato Slips for Planting?
Start sweet potato slips for planting with healthy, disease-free planting material. Provide warmth and appropriate moisture until vigorous shoots develop. Separate healthy slips, encourage roots to form, and gradually harden the young plants before transplanting them outdoors.
Plant sweet potato slips after frost danger has passed and the soil has warmed. Choose a sunny site with loose, well-drained soil and enough room for spreading vines. Keep newly transplanted slips appropriately moist while they establish without leaving the root zone continuously waterlogged.
Before planting, review our complete watering guide, soil mix guide, and free Soil Calculator.
PATCH PLANTS SUMMARY
Key Takeaways
- Begin with healthy sweet potatoes or vigorous disease-free slips.
- Warm conditions encourage reliable sprouting and growth.
- Provide useful light after shoots emerge.
- Keep propagation media moist without keeping it waterlogged.
- Separate healthy slips carefully without damaging important nodes.
- Develop healthy roots before permanent garden planting.
- Harden indoor-grown slips gradually.
- Wait until frost danger has passed and outdoor conditions are warm.
- Use loose, well-drained soil in a sunny location.
- Give vines adequate growing space.
- Monitor water, weeds, pests, and plant health through harvest.
What Are Sweet Potato Slips?
Sweet potato slips are shoots produced from sweet potato roots. These shoots become the young plants used to establish a new crop.
That distinction matters because sweet potato slips for planting are not treated exactly like ordinary potatoes. Sweet potatoes are propagated using slips rather than cutting a tuber into seed pieces.
University of Illinois Extension explains that sweet potatoes are started from plants called slips and recommends planting them once the soil has warmed after the last frost. University of Illinois Extension also recommends disease-free starting material.
Once established, sweet potato plants produce vigorous vines. If you are planning several edible crops together, explore our Outdoor Plants growing library before laying out the garden.
Before Starting Sweet Potato Slips for Planting
A little preparation makes growing sweet potato slips for planting much easier. Gather your materials and choose a warm propagation location before beginning.
Useful Supplies
- Healthy sweet potatoes
- Clean containers or jars
- Appropriate growing medium if using a soil-based method
- Clean water
- A warm growing location
- Useful natural or supplemental light
- Clean cutting tools when necessary
- Small containers for rooted slips if needed
If you are using growing media during propagation, review our soil mix guide to understand drainage, moisture retention, and aeration.
Propagation containers also dry differently depending on size and conditions. Our watering guide explains why plants should not automatically be watered according to a fixed calendar.
Step 1: Choose Healthy Sweet Potatoes
Successful sweet potato slips for planting begin with healthy starting material. Choose firm sweet potatoes without large soft areas, spreading decay, mold, or serious physical damage.
Prioritize Healthy Planting Material
When possible, use sweet potatoes intended for propagation or certified disease-free material from a reliable supplier.
Starting with unhealthy material can make every later stage more difficult.
Inspect for Decay
Do not ignore soft, wet, collapsing, or foul-smelling areas. These can indicate deterioration rather than healthy sprouting.
If you are unsure how healthy and deteriorating root tissue differ, read our root rot identification guide.
Step 2: Prepare the Sweet Potatoes for Sprouting
The next step in preparing sweet potato slips for planting is encouraging healthy shoots to emerge.
Sweet potatoes can be started using a suitable moist medium. Some home growers also use water-based propagation methods.
Keep Conditions Warm
Sweet potatoes are warm-season plants. A cold propagation area can slow the process considerably.
Manage Moisture Carefully
The growing environment should support sprouting without leaving the sweet potato continuously waterlogged.
Our complete guide to watering explains why excess moisture can become as problematic as insufficient moisture.
If your setup remains wet and begins developing unpleasant odors or soft tissue, investigate immediately rather than adding more water.
Use our overwatering guide to understand the broader signs associated with excessive moisture.
Step 3: Encourage Strong Sweet Potato Shoots
As shoots emerge, your future sweet potato slips for planting need suitable warmth and increasingly useful light.
Give Emerging Shoots Enough Light
Weak light can encourage elongated, less sturdy growth. Move developing shoots into a useful light environment once green growth becomes established.
If you are starting slips beside a window, use our complete indoor light guide to understand how window orientation and distance affect usable light.
You can also compare brighter growing positions with our guide to plants that like direct sunlight.
Continue Monitoring Moisture
Do not assume developing slips need water every day. Check the actual propagation environment.
The same moisture-management principles in our plant watering guide apply here.
Watch for Healthy Growth
Look for vigorous green shoots rather than collapsing, slimy, or seriously discolored tissue.
If developing foliage begins turning yellow, consult our yellow leaves guide before assuming that fertilizer is the solution.
Step 4: Separate Sweet Potato Slips Carefully
Once shoots are sufficiently developed, healthy sweet potato slips for planting can be separated from the parent sweet potato.
Choose Strong Slips
Select vigorous shoots with healthy stems and leaves. Avoid using severely damaged or decaying growth simply to increase the number of plants.
Protect the Nodes
Nodes on the lower portion of a slip are important because roots can develop from them.
Handle each slip gently and avoid unnecessary crushing or tearing.
Use Clean Tools When Necessary
If cutting is required, use clean equipment. Our Pruning Basics guide covers useful principles for clean tools and purposeful plant cuts.
Step 5: Root Sweet Potato Slips
Developing roots gives sweet potato slips for planting a stronger transition into their permanent growing environment.
Rooting Sweet Potato Slips in Water
The lower stem and suitable nodes can be placed in clean water while foliage remains above the waterline.
Observe the developing roots and water quality rather than leaving the setup unattended.
Rooting Slips in Growing Medium
Slips can also establish in a suitable moist medium. Keep the medium supportive of root development without allowing it to remain continuously saturated.
Read our soil mix guide for more information about aeration and drainage.
Check Root Health
Healthy new roots should look structurally sound rather than soft and decayed.
If roots become dark, mushy, or foul-smelling, consult our guide to identifying root rot.
If the entire slip is declining and the cause is unclear, work through our step-by-step plant rescue guide.
Step 6: Harden Off Sweet Potato Slips for Planting
Indoor-grown sweet potato slips for planting should be gradually introduced to outdoor conditions before permanent transplanting.
Start With Protected Exposure
Begin in a sheltered outdoor position rather than moving young slips immediately into an entire day of intense sunlight and wind.
Increase Outdoor Exposure Gradually
Increase time outdoors as the plants adapt. Watch the leaves and stems for stress.
Outdoor sunlight can be dramatically stronger than indoor window light, even when a room appears bright.
Our indoor light guide can help explain this difference.
Check Water More Frequently During the Transition
Wind, sunlight, temperature, and small container size can change how quickly propagation containers dry outdoors.
Use our watering guide instead of relying on a rigid schedule.
Step 7: Prepare Soil for Sweet Potato Slips for Planting
Good soil preparation gives sweet potato slips for planting a better environment for establishment and storage-root development.
Choose a Sunny Site
Sweet potatoes are warm-season crops that generally benefit from abundant sunlight.
For other plants suited to exposed positions, browse our Outdoor Plants guides.
Keep the Soil Loose
Dense, heavily compacted soil can interfere with root development. Prepare a loose and workable root zone with appropriate drainage.
Our complete soil guide explains the relationship between aeration, drainage, and moisture retention.
Consider Raised Ridges
Raised ridges can help create a loose root zone and can warm more quickly under suitable conditions. University of Illinois Extension recommends setting sweet potato slips on raised ridges and spacing plants roughly 12–18 inches apart.
Avoid Excessive Nitrogen
Do not assume that aggressive fertilization will automatically increase the harvest. Excessive nitrogen can encourage vigorous leafy growth.
FREE PATCH PLANTS TOOL
How Much Soil Does Your Sweet Potato Bed Need?
If you are preparing a rectangular raised bed, use the free Patch Plants Soil Calculator before buying soil.
Enter the length, width, and depth to calculate how much soil you need.
The same tool works as a raised bed soil calculator, garden soil calculator, and soil volume calculator for compatible rectangular spaces.
After estimating volume, use our soil guide to think about drainage and structure.
Step 8: Plant Sweet Potato Slips Correctly
Once conditions are warm and the slips are prepared, it is time to move your sweet potato slips for planting into the garden.
Wait for Warm Conditions
Do not rush planting merely because the slips look ready indoors. Sweet potatoes are sensitive to cold conditions.
Wait until frost danger has passed and the soil has warmed sufficiently for this warm-season crop.
Plant the Rooted Lower Portion
Set the rooted portion and suitable lower nodes into the prepared soil while keeping healthy foliage and the active growing tip above ground.
Space Sweet Potato Slips Properly
Give each plant enough room for vigorous vine growth. A common guideline is approximately 12–18 inches between plants, with substantially more room between rows for spreading vines.
Firm the Soil Gently
Settle soil around the roots without crushing or excessively compacting the root zone.
Water After Planting
Water after transplanting to help settle soil around the roots. Continue checking actual soil moisture as the slips establish.
Review our watering guide for healthy plants and learn the common signs of overwatering.
Step 9: Care for Sweet Potato Slips After Planting
After sweet potato slips for planting become established, attention shifts toward moisture, weed competition, vine growth, pests, and eventual harvest.
Maintain Appropriate Moisture
Young transplants need access to moisture while establishing, but continuously saturated soil can create problems.
Rainfall, soil texture, temperature, plant size, and root development all influence irrigation needs.
Our plant watering guide explains how to evaluate these factors.
Watch for Overwatering
If the soil remains wet and plants decline, investigate drainage before adding additional water.
Use our overwatering troubleshooting guide and root rot guide when needed.
Control Weeds During Establishment
Keep weeds from heavily competing with young plants. Once vigorous vines spread across the bed, they can shade more of the soil surface.
Monitor Foliage
If leaves turn yellow, do not immediately assume the crop needs fertilizer.
Use our yellow leaves troubleshooting guide to consider water, roots, nutrients, environmental stress, and other possible causes.
Watch Overall Plant Health
If a plant declines despite apparently reasonable conditions, inspect the entire growing environment.
Our plant rescue guide provides a systematic troubleshooting approach.
Common Sweet Potato Slip Problems
| Problem | Check First | Helpful Guide |
|---|---|---|
| Yellow leaves | Moisture, roots, light, nutrients | Yellow Leaves Guide |
| Wilting | Moisture and transplant stress | Watering Guide |
| Rotting stem or roots | Drainage and excessive moisture | Root Rot Guide |
| General decline | Whole growing environment | Plant Rescue Guide |
Why Are My Sweet Potato Slips Wilting?
Recently shipped, separated, rooted, or transplanted sweet potato slips for planting can wilt because of environmental stress.
Check moisture before automatically watering. Dry roots can cause wilting, but damaged roots in excessively wet soil can also struggle to supply the foliage.
Use our watering troubleshooting guide before making major changes.
Why Are My Sweet Potato Slips Turning Yellow?
Yellow leaves can result from several causes. Examine moisture, drainage, root condition, light, temperature, transplant stress, and nutrition.
Our yellow leaves guide provides a broader diagnostic framework.
Why Are My Sweet Potato Slips Rotting?
Rotting tissue can be associated with excessive moisture, poor drainage, damaged material, or unhealthy starting stock.
Remove severely decayed material and investigate the underlying conditions. Use our root rot guide for additional help.
Why Aren’t My Sweet Potato Slips Rooting?
Check the condition of the nodes, temperature, moisture, and health of the slip itself.
If the base of a slip becomes soft and deteriorated, simply leaving it in water longer may not solve the problem.
Why Do I Have Lots of Vines but Few Sweet Potatoes?
Consider growing season length, sunlight, soil structure, spacing, moisture, cultivar, and fertilizer use.
Excessive nitrogen is one factor that can favor leafy growth, so do not repeatedly fertilize merely because vines appear healthy.
Harvesting Sweet Potatoes Grown From Slips
Successfully establishing sweet potato slips for planting eventually leads to the most rewarding part of the process: harvesting the storage roots.
Harvest timing depends on cultivar, climate, planting date, and growing conditions rather than one universal date.
Dig Carefully
Sweet potato skins can be damaged during harvest. Loosen soil around the plants carefully instead of driving tools directly into the root cluster.
Handle Freshly Dug Roots Gently
Avoid unnecessary cuts, bruises, and abrasions.
University of Illinois Extension also recommends careful handling during harvest and provides guidance for curing and storage.
KEEP GROWING WITH PATCH PLANTS
Helpful Resources for Your Sweet Potato Garden
Explore our Outdoor Plant Care & Growing Guides for more garden projects and use the Plant Care library when troubleshooting plant problems.
Before filling a garden bed, use our Soil Calculator to estimate soil volume. Then read the soil mix guide to understand drainage and aeration.
For irrigation questions, use our complete watering guide. If the garden stays wet, compare symptoms with the signs of overwatering.
For unhealthy roots, read how to identify and manage root rot. For discolored foliage, consult our yellow leaves guide.
If you start sweet potato slips for planting indoors, review our indoor light guide. If a plant begins declining, use the plant rescue guide.
For cutting and propagation hygiene, see Pruning Basics. You can also return to Patch Plants for more practical gardening guides.
Frequently Asked Questions About Sweet Potato Slips for Planting
What are sweet potato slips for planting?
Sweet potato slips for planting are young shoots used to establish new sweet potato plants. They develop from sweet potato roots and can be separated, rooted, hardened off, and transplanted into warm garden soil.
How do you grow sweet potato slips for planting?
Begin with healthy sweet potatoes, provide warmth and appropriate moisture, allow vigorous shoots to develop, separate suitable slips, encourage roots, harden the plants gradually, and transplant them after frost danger has passed.
Can you root sweet potato slips in water?
Yes. Lower stem nodes can be placed in clean water while the foliage remains above the waterline. Monitor the developing roots and watch for deterioration.
Can you root sweet potato slips in soil?
Yes. A suitable moist growing medium can support rooting. Use a medium that provides useful moisture without remaining continuously waterlogged. See our soil guide for more information.
When should sweet potato slips for planting go outside?
Wait until frost danger has passed and soil and weather conditions have become warm enough for this warm-season crop.
Do sweet potato slips need full sun?
Established sweet potatoes benefit from abundant sunlight. Indoor-grown slips should be gradually acclimated to stronger outdoor sunlight rather than moved abruptly from protected conditions.
How far apart should sweet potato slips be planted?
A commonly recommended range is approximately 12–18 inches between plants. Spreading varieties also require considerably more room between rows for vine growth.
Why are my sweet potato slips turning yellow?
Possible causes include moisture problems, root stress, temperature, transplant shock, nutrient conditions, and other environmental factors. Use our yellow leaves troubleshooting guide before assuming a single cause.
Why are my sweet potato slips wilting?
Check soil or propagation-medium moisture, root health, temperature, and recent transplant stress. Both insufficient water and damaged roots in excessively wet conditions can interfere with water uptake.
Why are my sweet potato slips rotting?
Excessive moisture, poor drainage, damaged tissue, or unhealthy starting material can contribute to decay. Review our root rot guide if the roots or stem bases become soft.
How much soil do I need for a sweet potato raised bed?
Measure the bed’s length, width, and desired soil depth and enter those dimensions into the free Patch Plants Soil Calculator.
Final Thoughts on Sweet Potato Slips for Planting
Growing sweet potato slips for planting gives you control over the crop from the earliest propagation stage. Success starts with healthy material and continues through warmth, useful light, careful moisture management, rooting, hardening, soil preparation, and thoughtful transplanting.
Once sweet potato slips for planting are established outdoors, focus on maintaining suitable growing conditions rather than constantly interfering with the vines. Monitor soil moisture, weeds, foliage, pests, and overall plant vigor.
If problems appear, work through them systematically with our watering guide, yellow leaves guide, root rot guide, and plant rescue guide.
Before your next garden project, use our free Soil Calculator, browse the Outdoor Plants category, explore the Plant Care category, or return to Patch Plants.