How to clean plant leaves without damaging them is an important skill for anyone growing indoor plants. Dust, mineral residue, and everyday household grime can gradually collect on foliage, making naturally glossy leaves look dull and reducing the amount of light reaching their surfaces.
Fortunately, keeping houseplant leaves clean does not require expensive sprays or complicated homemade mixtures. A soft cloth, room-temperature water, and the right technique are enough for most popular indoor plants. Delicate, hairy, or powder-coated leaves need a different approach, though, and knowing the difference can prevent unnecessary damage.
This guide explains nine practical steps for cleaning plant leaves safely, compares cleaning methods for different foliage types, and shows how to restore natural leaf shine. You will also learn how often to clean, identify suspicious leaf deposits, avoid common mistakes, and maintain healthy foliage throughout the year.
What Is the Best Way to Clean Plant Leaves?
The best way to clean plant leaves is to gently wipe smooth foliage with a soft cloth dampened with room-temperature water, supporting each leaf from underneath. For sturdy plants with many smaller leaves, a gentle rinse may be more practical. Hairy or powder-coated foliage usually requires careful dry cleaning or minimal handling.
Plain water is the preferred starting point because it removes ordinary dust without leaving additional substances on the leaf surface.
Avoid using cooking oils, milk, mayonnaise, or homemade leaf-shine coatings. These products are unnecessary for routine cleaning and may leave residue or damage sensitive foliage.
For the best results, choose the cleaning method according to the plant’s natural leaf texture rather than using one technique for every houseplant.
Key Takeaways
- Learning how to clean plant leaves correctly helps remove dust and allows more available light to reach foliage.
- A soft microfiber or lint-free cloth dampened with room-temperature water is suitable for many smooth-leaved houseplants.
- Support large leaves underneath while wiping to avoid bending, tearing, or damaging their stems.
- Sturdy plants with numerous smaller leaves can sometimes be rinsed gently in a sink or shower.
- African violets and other hairy-leaved plants are generally better cleaned with a soft, dry brush.
- Succulents with powdery protective coatings should be handled as little as possible because rubbing can permanently disturb their natural bloom.
- Clean leaves when visible dust accumulates rather than following a rigid schedule that may cause unnecessary handling.
- Plain water is preferable to milk, banana peels, cooking oils, or general household cleaning products.
- White residue, sticky deposits, and fine webbing may indicate different problems that require separate identification.
- Regular leaf inspections also provide an opportunity to identify pests before infestations become severe.
Why Is Cleaning Plant Leaves Important?
Houseplant leaves naturally collect dust from household activity, open windows, fabrics, heating systems, and ordinary indoor air movement.
Although light dust rarely causes an immediate emergency, a substantial buildup can affect the appearance of leaves and interfere with the light available for photosynthesis.
Cleaning also gives gardeners an opportunity to examine leaves for insects, damaged tissue, and unusual residues.
1. Dust Reduces Light Reaching Leaves
Photosynthesis allows plants to use light energy to produce carbohydrates needed for growth and maintenance.
Dust accumulating on foliage can shade the leaf surface and reduce the amount of incoming light reaching photosynthetic tissues.
This may be particularly relevant for indoor plants already receiving limited daylight.
According to the University of Georgia Cooperative Extension’s indoor plant guide, accumulated dust can interfere with the light reaching leaves and should be removed through suitable cleaning methods.
However, cleaning cannot replace adequate lighting. A plant in a dark room still needs sufficient natural or artificial light to grow successfully.
For placement advice, read our complete indoor plant lighting guide.
2. Cleaning Helps Maintain Leaf Surface Function
Leaves exchange gases with the surrounding atmosphere through microscopic openings called stomata.
Stomata help regulate carbon dioxide uptake and water-vapour loss. Their distribution varies by plant species, and many broad-leaved terrestrial plants have numerous stomata on the lower leaf surface.
Heavy dust or surface contamination can interfere with normal leaf processes.
Gentle cleaning removes accumulated material without requiring additional coatings.
Avoid aggressive rubbing because the cuticle and other surface structures also help protect leaves against water loss and environmental stress.
3. Leaf Cleaning Supports Pest Inspection
Dust is not proof that a plant has pests. However, a leaf-cleaning session provides an excellent opportunity to inspect the areas where insects and mites may hide.
Check leaf undersides, new growth, stems, and places where leaves join their stalks.
Spider mites, mealybugs, scale insects, and thrips may initially be difficult to notice.
Early identification makes it easier to separate an affected plant and choose an appropriate response.
For information on common household plant pests, see the University of Minnesota Extension guide to managing insects on indoor plants.
4. Cleaning Restores Natural Leaf Appearance
Some indoor plants naturally develop glossy leaves.
Rubber plants, ZZ plants, peace lilies, and many Philodendrons are good examples.
Removing accumulated dust allows their natural surface texture and colour to become more visible.
Other plants naturally have matte, velvety, or powdery leaves. These should not be forced to look glossy because their natural surfaces serve different purposes.
Quick Comparison: Best Ways to Clean Different Plant Leaves
Not every leaf tolerates water, brushing, or wiping equally well. Use this comparison before choosing a cleaning method.
| Leaf Type | Best Cleaning Method | Important Precaution |
|---|---|---|
| Large, smooth leaves | Soft damp cloth | Support the leaf while wiping |
| Small, sturdy leaves | Gentle rinse or damp cloth | Avoid excessive water pressure |
| Hairy or fuzzy leaves | Soft dry brush | Avoid rubbing and prolonged wetness |
| Thin, delicate leaves | Very gentle brushing or careful rinse where suitable | Prevent tearing |
| Powder-coated succulent leaves | Minimal handling | Preserve the natural waxy bloom |
| Thick, waxy leaves | Soft damp cloth | Do not apply unnecessary oils |
| Fine fern fronds | Gentle rinse where appropriate | Avoid harsh sprays and prolonged wet foliage |
Best practical advice: Start with the gentlest method that will remove the dust. Increase cleaning intensity only when the plant’s leaf characteristics make it appropriate.
What Do You Need to Clean Indoor Plant Leaves?
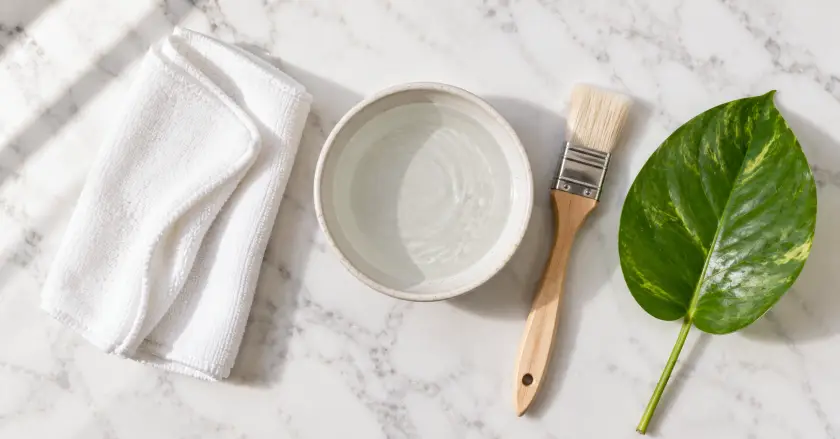
Most routine cleaning can be completed using simple household supplies.
- Soft microfiber cloth: Suitable for gently wiping large, smooth foliage.
- Lint-free cotton cloth: An alternative for leaves that tolerate damp wiping.
- Clean room-temperature water: Helps remove dust without temperature shock or unnecessary chemical residue.
- Soft clean brush: Useful for hairy leaves, delicate textures, and difficult-to-reach areas.
- Small bowl: Convenient for rinsing the cloth.
- Clean towel: Useful for protecting surfaces and absorbing excess moisture.
- Magnifying glass: Optional but helpful when checking suspicious leaf deposits or pests.
Keep cleaning cloths and brushes separate from those used for household detergents or surface disinfectants.
If a plant may be infested, clean the tools appropriately before using them on another plant.
How to Clean Plant Leaves Safely: 9 Easy Steps
Step 1: Identify the Leaf Surface
Before cleaning, examine the foliage closely.
Is the leaf smooth and leathery, thin and delicate, covered in fine hairs, or protected by a powdery coating?
Plants with broad, smooth leaves generally tolerate gentle damp wiping. Hairy leaves may be damaged by rubbing or prolonged moisture, while powder-coated succulents should receive minimal contact.
Check the exact species if you are uncertain. A cleaning technique suitable for a Monstera may be inappropriate for an African violet.
Step 2: Choose a Suitable Cleaning Location
Move smaller plants to a stable work surface or sink when practical.
Make sure there is enough room to reach both sides of the foliage without bending stems against nearby furniture.
For large floor plants, place a towel beneath the container and work where the plant stands.
Avoid cleaning directly in harsh sunlight, near strong heat sources, or beside a cold open window.
Keep electrical outlets and nearby furniture protected from dripping water.
Step 3: Use Room-Temperature Water
Fill a small bowl with clean water close to room temperature.
Cold water may cause spotting or stress on sensitive foliage, particularly in warm indoor environments.
Very hot water can damage plant tissues.
Ordinary tap water is suitable for cleaning many species. If your water leaves noticeable mineral deposits, consider distilled or appropriately filtered water for sensitive plants.
Do not add fertilizer, perfume, household disinfectant, or essential oils to routine leaf-cleaning water.
Step 4: Dampen a Soft Cloth
Dip a microfiber or lint-free cloth into the water and wring it out thoroughly.
The cloth should feel damp rather than soaking wet.
A dripping cloth can spread water into leaf axils, onto furniture, or into decorative containers.
For plants with delicate new leaves, use particularly light pressure and avoid catching the cloth on emerging growth.
Step 5: Support Each Leaf From Underneath
Large leaves can tear if pushed downward without support.
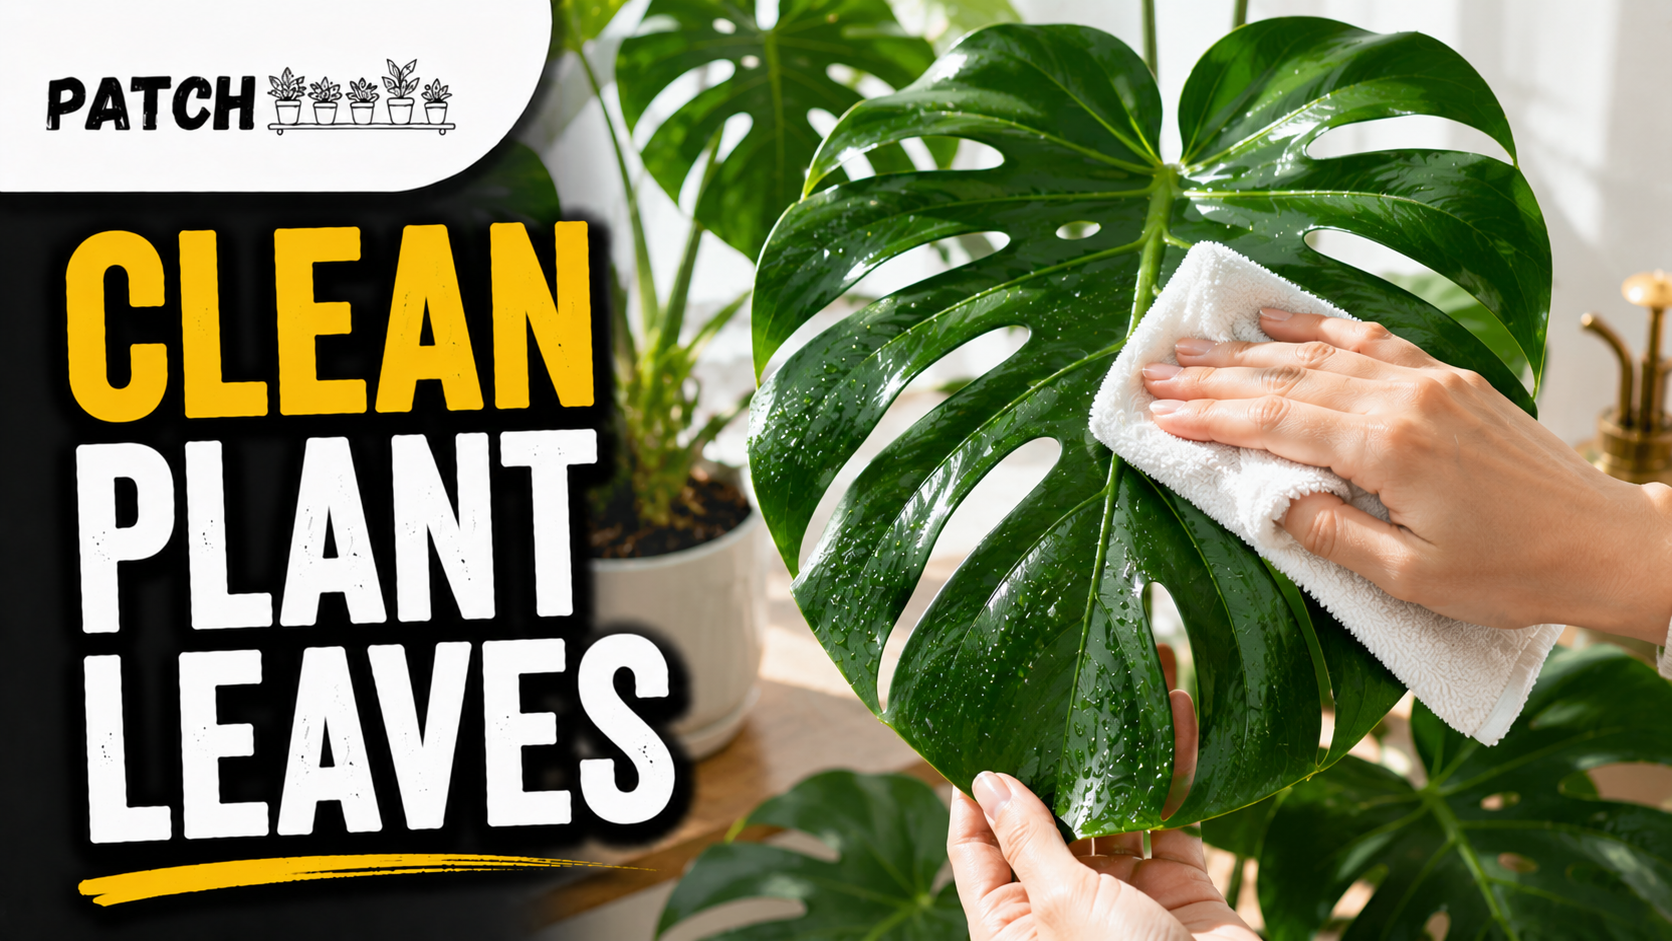
Place one hand gently beneath the leaf and use the other to guide the cloth across its surface.
Wipe along the natural shape of the leaf without stretching or twisting it.
For deeply split Monstera leaves, clean separate sections carefully rather than pulling across the openings.
Step 6: Clean the Upper Leaf Surface
Move the damp cloth gently from the base toward the tip of the leaf.
Use light strokes and avoid repeated aggressive scrubbing.
Rinse the cloth when dust accumulates so you are not transferring grime from one leaf to another.
If a mark does not come away easily, investigate whether it is a natural leaf marking, damage, mineral residue, or a pest-related symptom before rubbing harder.
Step 7: Inspect and Clean the Underside
Turn or lift the leaf carefully to inspect its underside.
Use a clean section of the damp cloth where the leaf texture allows.
Look for small insects, fine webbing, eggs, sticky deposits, or unusual discoloration.
Do not scrape suspicious material from delicate leaves without first identifying it.
A plant showing signs of infestation may need isolation and pest management in addition to cleaning.
Step 8: Let the Foliage Dry Naturally
After cleaning, allow the plant to dry in a suitable location with normal airflow.
Remove standing water from leaf joints, decorative pots, and container saucers.
Do not use a hot hairdryer to speed drying. Excess heat can damage foliage.
Avoid leaving sensitive plants with wet leaves in cold, poorly ventilated conditions.
Step 9: Return the Plant to Appropriate Growing Conditions
Once the leaves are dry, return the plant to its usual suitable position.
Check that it receives the correct amount of light and is not exposed to strong drafts.
Take a final look at the leaves and stems for damage or pests you may have missed.
If the plant appears unhealthy, do not assume cleaning alone will correct the issue.
Watering, lighting, humidity, root health, and temperature still determine how well the plant grows.
How to Clean Plant Leaves With Different Methods
Method 1: Damp Cloth for Smooth Leaves
A damp cloth is the preferred method for many popular indoor plants.
It works particularly well on rubber plants, Monsteras, peace lilies, ZZ plants, pothos, snake plants, and smooth-leaved Philodendrons.
Use a light wiping motion, support the leaf, and clean the cloth regularly.
For a plant with unusually delicate new growth, wait until the leaves have hardened sufficiently before attempting detailed cleaning.
Method 2: Gentle Rinse for Sturdy Plants
Some plants have too many small leaves to wipe individually.
For suitable moisture-tolerant species, a gentle rinse with room-temperature or slightly lukewarm water can remove dust efficiently.
Use low water pressure and support trailing stems where necessary.
Protect the growing medium from being washed away, and allow excess water to drain completely.
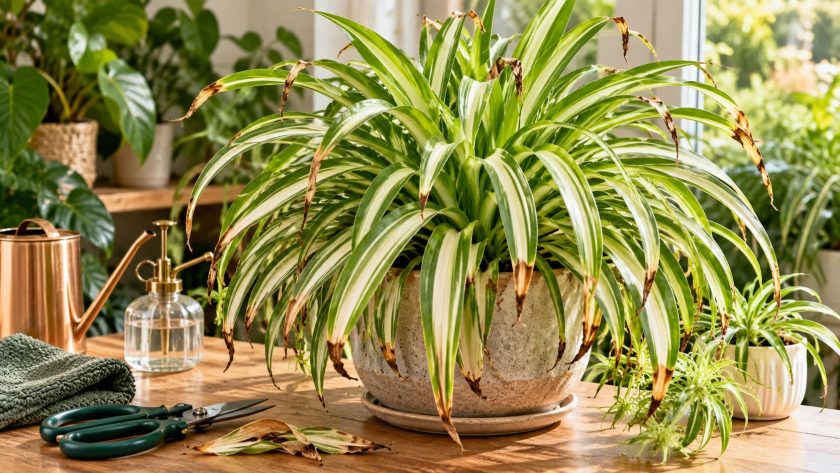
This method is often practical for spider plants, pothos, and selected ferns.
However, a rinse should not be used indiscriminately on delicate, hairy, powder-coated, or water-sensitive foliage.
Method 3: Soft Dry Brush for Fuzzy Leaves
Hairy leaves require greater care.
African violets are a classic example. Their foliage can be damaged by rough wiping, and prolonged water contact may produce visible spotting under unsuitable conditions.
Use a small clean brush with soft bristles to remove loose dust.
Move gently across the surface without flattening the leaf hairs.
Do not use a stiff toothbrush or scrub delicate leaves.
Method 4: Minimal Handling for Powder-Coated Succulents
Some succulents produce a natural powdery wax layer known as farina or epicuticular wax.
This protective coating can help reduce water loss and influence how light interacts with the leaf surface.
Touching or wiping the foliage may leave permanent fingerprints or patches where the coating has been disturbed.
For these plants, prevention is better than repeated cleaning.
Keep them away from unnecessary dust and handling. Remove loose debris with exceptional care and avoid disturbing the natural coating whenever possible.
How to Make Plant Leaves Shiny Naturally
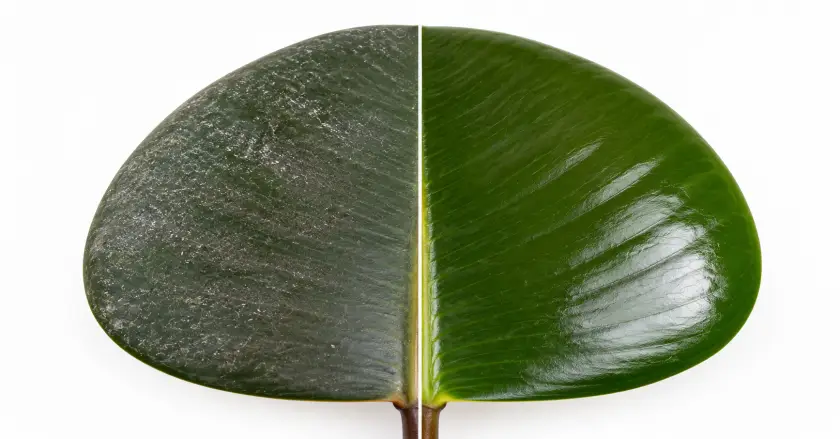
Gardeners frequently search for ways to make indoor plant leaves shiny without commercial products.
The safest answer is usually the simplest: remove accumulated dust and maintain healthy growing conditions.
Plants with naturally glossy foliage do not need additional coatings to look attractive.
Why Plain Water Is Usually Enough
A damp cloth removes the dull layer of dust that makes many smooth leaves appear faded.
Once clean, the natural waxy surface of a rubber plant, ZZ plant, or peace lily may reflect more light and look noticeably brighter.
There is no need to add food products or oils to produce a temporary shine.
For plants that naturally have matte leaves, accept their normal appearance instead of trying to change it.
Should You Use Banana Peels on Plant Leaves?
Banana peels are sometimes recommended as a homemade leaf-polishing treatment.
However, there is no good reason to prefer banana residue over plain water for ordinary leaf cleaning.
Rubbing the inside of a peel across foliage may leave sugars or other residue behind.
A soft damp cloth is cleaner, more predictable, and less likely to create an unnecessary film.
Can You Clean Plant Leaves With Milk?
Milk is another popular homemade leaf-shine suggestion.
It is not recommended for routine leaf cleaning.
The University of Minnesota Extension specifically advises against using milk and leaf-shine products on houseplants.
Milk may leave residue on the foliage and offers no necessary advantage over careful cleaning with water.
Use a clean damp cloth instead.
Should You Apply Olive Oil or Coconut Oil?
Cooking oils can leave a greasy film on plant leaves.
This is not an appropriate routine cleaning treatment, particularly for delicate or naturally textured foliage.
Oil residue may also collect additional dust and complicate future cleaning.
If your goal is healthy-looking leaves, focus on removing dust and providing suitable light and watering conditions.
Are Commercial Leaf-Shine Sprays Safe?
Some commercial leaf-polish products are marketed for specific ornamental plants, but they are not necessary for routine care.
They can leave coatings on foliage, and certain products or applications may damage sensitive plants.
As a general houseplant-care recommendation, a soft damp cloth is preferable.
The Penn State Extension guide to houseplant equipment also recommends wiping away dust rather than relying on leaf-shine sprays.
How to Clean Leaves on 13 Popular Houseplants
Different houseplants have different leaf surfaces. Use the following species-specific guidance to select a safe cleaning method.
1. How to Clean Rubber Plant Leaves
Botanical name: Ficus elastica.
Rubber plants have broad, smooth leaves that can collect visible dust.
Support each leaf from underneath and wipe gently with a damp microfiber cloth.
Clean the upper surface first, then inspect the underside and the leaf stalk.
Avoid using oils or polishing products. Healthy rubber plant leaves are naturally glossy when clean.
For growing advice, visit our rubber plant care guide.
2. How to Clean Monstera Leaves
Botanical name: Monstera deliciosa.
Monstera leaves can become large and deeply divided as the plant matures.
Use a damp cloth to clean each section carefully, supporting the foliage rather than pulling across the splits.
Inspect the underside and areas around the leaf stalk for pests.
For large plants that cannot easily be moved, cleaning individual leaves in place is often more practical than showering the entire specimen.
Read our Monstera plant care guide for additional advice.
3. How to Clean Snake Plant Leaves
Botanical name: Dracaena trifasciata, formerly Sansevieria trifasciata.
Snake plants have firm upright leaves that are relatively easy to clean.
Hold each leaf carefully and wipe along its length with a damp cloth.
Avoid forcing the leaf sideways, particularly near the base where it emerges from the potting medium.
Do not allow water to remain trapped in the central growth area.
For full care instructions, see our snake plant care guide.
4. How to Clean Orchid Leaves
Botanical group: Orchidaceae, including common Phalaenopsis hybrids.
Many commonly grown moth orchids have firm, leathery leaves suitable for gentle damp wiping.
Use room-temperature water and avoid applying pressure where leaves meet the crown.
Examine leaf undersides for scale and other pests.
Keep water from collecting in the crown of Phalaenopsis orchids, particularly under cool indoor conditions.
Orchids vary widely, so confirm the care needs of unusual or delicate species before rinsing their foliage.
5. How to Clean Fiddle Leaf Fig Leaves
Botanical name: Ficus lyrata.
Fiddle leaf figs have large leaves with prominent veins and slightly textured surfaces.
Use a soft damp cloth and support each leaf while cleaning.
Work around the veins rather than repeatedly rubbing over raised areas.
Check both sides of the leaf and avoid unnecessary polishing products.
For more care advice, visit our fiddle leaf fig care guide.
6. How to Clean Peace Lily Leaves
Botanical name: Spathiphyllum species and cultivars.
Peace lilies have broad, glossy foliage that can show dust clearly.
Gently wipe each mature leaf with a damp cloth, supporting it underneath.
Avoid harsh rubbing or allowing cleaning products to collect near new growth.
When leaves become dull, consider the overall growing conditions as well as cleaning needs.
Our peace lily care guide explains watering, lighting, and common foliage problems.
7. How to Clean Calathea Leaves
Botanical group: Calathea and related Goeppertia species.
Many Calatheas have thin, patterned leaves that require gentle handling.
Use a lightly damp cloth on smooth-leaved types, applying very little pressure.
For velvety or delicate surfaces, a soft brush may be more appropriate.
If white marks are present, investigate water quality and possible mineral deposits before applying additional cleaning products.
For more information, read our complete Calathea care guide.
8. How to Clean Pothos Leaves
Botanical name: Epipremnum aureum.
Pothos leaves are generally smooth and tolerate gentle cleaning.
For compact plants, wipe individual leaves with a damp cloth.
For long trailing vines, a gentle rinse may be more efficient if the plant is sturdy enough and the growing medium can be protected.
Avoid tangling or pulling the vines during cleaning.
Our pothos care guide covers general maintenance and propagation.
9. How to Clean ZZ Plant Leaves
Botanical name: Zamioculcas zamiifolia.
ZZ plants have naturally glossy leaflets arranged along upright stems.
Dust can be removed with a soft damp cloth.
Support the stem and clean individual leaflets without bending them excessively.
Avoid commercial polish because the plant already has a naturally attractive leaf surface.
For watering and growth advice, consult our ZZ plant care guide.
10. How to Clean Boston Fern Leaves
Botanical name: Nephrolepis exaltata.
Boston ferns have numerous small leaflets arranged on delicate fronds.
Wiping every leaflet individually is usually impractical and may cause damage.
A gentle rinse with room-temperature water can be useful for suitable established plants.
Use low pressure, allow the plant to drain, and provide airflow so the fronds do not remain excessively wet.
For humidity and general maintenance, read our Boston fern care guide.
11. How to Clean Philodendron Leaves
Botanical group: Philodendron species and cultivars.
Philodendrons include many different leaf shapes and textures.
Smooth, leathery leaves generally tolerate a soft damp cloth.
Velvety species such as Philodendron melanochrysum require more delicate handling.
When cleaning climbing plants, avoid pulling at aerial roots or damaging emerging leaves.
See our complete Philodendron care guide for species-specific growing advice.
12. How to Clean Hoya Leaves
Botanical group: Hoya species and cultivars.
Many Hoyas have thick, waxy leaves that tolerate gentle wiping.
However, some species have textured or hairy foliage that should receive minimal contact.
Choose the method according to the actual leaf surface rather than assuming every Hoya can be cleaned identically.
Use plain water on smooth foliage and avoid adding oil-based shine products.
13. How to Clean Aloe Vera Leaves
Botanical name: Aloe vera.
Aloe vera leaves are thick, fleshy, and edged with small teeth.
Remove ordinary dust from suitable surfaces using a soft, lightly damp cloth.
Take care around the leaf edges and avoid damaging the fleshy tissue.
Do not allow water to collect in the central rosette, particularly in cool or poorly ventilated conditions.
Routine misting is unnecessary for healthy aloe plants.
How Often Should You Clean Indoor Plant Leaves?
There is no universal cleaning interval suitable for every houseplant.
The amount of dust that collects depends on indoor air movement, the season, nearby activity, leaf surface characteristics, and how frequently windows are opened.
For many homes, inspecting leaves during routine watering and cleaning visible dust as needed is more practical than following a rigid timetable.
| Growing Situation | Suggested Inspection | Cleaning Approach |
|---|---|---|
| Ordinary indoor room | Every one to two weeks | Clean when visible dust accumulates |
| Dusty or high-traffic room | Weekly | Wipe suitable leaves as needed |
| Near ventilation or heating systems | Regularly during use | Check for increased dust and dry-air stress |
| Fuzzy-leaved plants | During routine care | Brush only when necessary |
| Powder-coated succulents | Visual inspection | Avoid unnecessary handling |
| Plants recently purchased | Frequently during initial monitoring | Inspect for pests before introducing them to other plants |
These are practical inspection suggestions rather than scientific cleaning requirements.
A plant with clean leaves does not need wiping merely because two weeks have passed.
How to Remove White Spots and Other Residue From Leaves
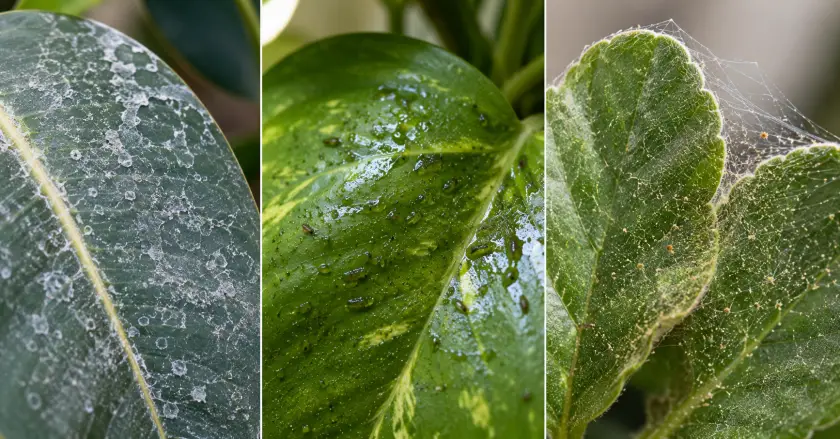
Not every visible mark is ordinary dust.
White spots, sticky surfaces, and fine webbing can have several causes. Correct identification is important because cleaning alone may not resolve the underlying problem.
White Chalky Spots From Hard Water
Hard-water deposits can appear as pale, chalky marks where water droplets have evaporated.
These marks may contain minerals such as calcium compounds.
If the residue is superficial and the leaf is otherwise healthy, gently wipe it with a soft damp cloth.
Using distilled or suitably filtered water for cleaning may reduce new deposits on sensitive foliage.
However, not every white mark is a mineral deposit. If it looks powdery, fuzzy, or is associated with damaged tissue, investigate other causes.
White Cottony Deposits From Mealybugs
Mealybugs often appear as small white, cotton-like insects clustered around leaf joints, stems, and sheltered growth areas.
They may also produce sticky honeydew.
If you suspect mealybugs, isolate the affected plant and inspect nearby specimens.
Do not simply polish the leaves and assume the infestation has disappeared.
Use appropriate pest-management guidance and products specifically labelled for the plant and pest when treatment is necessary.
Fine Webbing and Small Moving Specks
Fine webbing, pale stippling, and small moving mites may indicate spider mites.
Examine the undersides of leaves with a magnifying glass.
A gentle rinse can help remove some mites from suitable plants, but serious infestations may need repeated monitoring and additional management.
Avoid automatically spraying strong homemade mixtures onto sensitive foliage.
For broader pest-related reading, visit our plants and pest-management guide.
Sticky Residue on Houseplant Leaves
Sticky deposits may be honeydew produced by sap-feeding pests such as aphids, scale insects, or mealybugs.
Inspect leaves above and around the sticky area to identify possible insects.
Honeydew may sometimes collect on lower leaves, tables, or windowsills beneath an infested plant.
Clean ordinary surface residue carefully using water where suitable, but address the actual pest problem if one is present.
Brown Spots After Cleaning
Brown spots appearing after cleaning can have several possible explanations.
Physical rubbing damage, cold water, unsuitable cleaning products, environmental stress, and pre-existing leaf disease can all contribute to discoloration.
Do not assume that every brown mark is caused by the cleaning itself.
Review the plant’s location, recent watering, leaf condition, and cleaning method.
For more guidance, read our leaf curling, browning and drooping guide.
Can Cleaning Plant Leaves Remove Pests?
Gentle cleaning can remove some visible insects, debris, and residues from suitable leaf surfaces.
However, routine cleaning is not a guaranteed treatment for an established pest infestation.
Some pests hide in leaf joints, stems, growing points, or other locations that ordinary wiping does not reach.
Inspect Before Cleaning
When unusual spots, webbing, or sticky residues appear, identify the likely cause before applying a treatment.
Check the undersides of leaves and new growth.
If the plant is heavily infested, move it away from healthy houseplants while you assess the problem.
Use Appropriate Pest-Control Products
If pest treatment becomes necessary, choose an option appropriate for the identified pest and safe for the plant.
Insecticidal soaps and horticultural oils have specific uses, but they should be applied only according to product instructions and local requirements.
Household dishwashing liquid is not automatically equivalent to a formulated insecticidal soap.
Always check the plant’s sensitivity before using any treatment, especially on fuzzy or delicate foliage.
Monitor After Treatment
A pest infestation may require follow-up inspections.
Watch for new damage, insects, or residues.
Keep cleaning tools free from transferred pests and avoid moving immediately between an infested plant and healthy specimens without appropriate hygiene.
Seasonal Plant Leaf Cleaning Guide
Seasonal changes affect indoor light, ventilation, humidity, and plant growth.
They can also influence when foliage needs attention.
Spring Leaf Cleaning
Spring is a useful time to inspect houseplants as daylight increases and many species resume more active growth.
Remove accumulated winter dust from suitable leaves and check for pests.
Some plants may need gradual adjustment to stronger seasonal sunlight.
Summer Leaf Cleaning
During summer, open windows, household activity, and dry outdoor conditions may contribute to dust accumulation.
Check foliage when watering and clean visible deposits as needed.
Do not leave newly cleaned sensitive plants exposed to sudden intense sunlight or excessive heat.
Autumn Leaf Cleaning
Autumn is a useful time to inspect plants before the indoor heating season.
Check leaves for dust, insects, and signs of environmental stress.
If plants have spent summer outdoors, inspect them carefully before bringing them inside.
Winter Leaf Cleaning
Winter often brings lower light levels, drier indoor air, and reduced growth for many houseplants.
Keeping naturally smooth foliage free from heavy dust can help plants make use of available light.
However, avoid unnecessary wetting when indoor temperatures are low or drying conditions are poor.
Read our houseplant humidity management guide for additional indoor-care ideas.
How to Keep Houseplant Leaves Clean Longer
Keep Plants Away From Heavy Dust Sources
Where practical, avoid positioning delicate plants directly beside areas that produce heavy dust.
Regular household cleaning and appropriate ventilation may help reduce the amount of material accumulating on foliage.
However, plant placement should continue to prioritize suitable light, temperature, and growing conditions.
Use Suitable Watering Techniques
When watering, avoid unnecessarily splashing potting soil onto lower leaves.
Water according to the species’ needs and empty excess water from decorative containers.
For practical watering advice, see our complete plant watering guide.
Maintain Appropriate Humidity
Humidity requirements vary considerably between plants.
Boston ferns and some tropical foliage plants may require more humid conditions than ZZ plants or many succulents.
Use a hygrometer if you need to assess indoor humidity.
Do not assume frequent misting is necessary for cleaning or humidity management.
Monitor Plant Health
A naturally healthy leaf usually looks better after dust is removed.
However, yellowing, wilting, leaf spots, and brown edges often indicate issues unrelated to ordinary cleaning.
Check soil moisture, lighting, root health, and environmental changes if a plant continues to decline.
Our overwatering guide explains one of the most common causes of unhealthy indoor foliage.
Is Cleaning Plant Leaves Safe Around Pets?
Plain water and a clean cloth help avoid introducing unnecessary cleaning chemicals around household pets.
However, the safety of the plant itself also matters.
Some common houseplants contain substances that can irritate cats and dogs when chewed.
Keep pets away from cleaning supplies, wet floors, exposed potting materials, and any pest-control products.
If a plant requires pest treatment, follow the relevant product label regarding people and animals entering the treated area.
For safer plant selection, read our cat-friendly plant guide and dog-friendly plant guide.
Plant Leaf Cleaning Checklist
| Task | When to Check | What to Look For |
|---|---|---|
| Check leaf texture | Before cleaning | Smooth, hairy, delicate, or powder-coated foliage |
| Inspect for dust | During routine watering | Visible surface buildup |
| Choose cleaning tools | Before cleaning | Clean soft cloth or suitable brush |
| Check water temperature | Before wiping or rinsing | Water near room temperature |
| Support large leaves | During wiping | No excessive bending or pulling |
| Inspect leaf undersides | During cleaning | Pests, eggs, unusual deposits |
| Allow leaves to dry | After cleaning | No trapped water around sensitive growth |
| Inspect for pests | Regularly and when symptoms appear | Webbing, sticky deposits, insects, stippling |
| Check indoor humidity | When plants show environmental stress | Humidity appropriate to the species |
| Review plant health | During routine care | New growth, leaf colour, root-zone moisture |
Common Mistakes When Cleaning Plant Leaves
- Using rough cloths: Abrasive materials may scratch or bruise delicate foliage.
- Rubbing leaves without support: Large leaves can bend or tear when pushed too firmly.
- Using very cold or hot water: Extreme temperatures can damage sensitive leaves.
- Applying banana peels or milk: These unnecessary treatments may leave residue rather than provide meaningful cleaning benefits.
- Applying cooking oils: Oil coatings are not needed for healthy foliage and can collect grime.
- Using household cleaners: Disinfectants, fragranced sprays, and general surface cleaners are not appropriate for routine leaf cleaning.
- Wiping powder-coated succulents: Rubbing can disturb the protective natural surface coating.
- Soaking fuzzy leaves unnecessarily: Delicate hairy foliage may be damaged by improper wet cleaning.
- Cleaning too aggressively: Frequent scrubbing can create more damage than ordinary dust.
- Assuming white spots are always minerals: Some deposits may indicate pests or diseases.
- Ignoring leaf undersides: Insects and mites often hide in less visible areas.
- Assuming cleaning cures pest infestations: Established infestations need identification and appropriate management.
- Leaving water trapped in plant crowns: Prolonged moisture may contribute to problems in susceptible species.
- Using cleaning as a substitute for care: Plants still require suitable light, watering, temperature, and root conditions.
Frequently Asked Questions About Cleaning Plant Leaves
What is the best way to clean plant leaves?
The best way to clean plant leaves is to use a soft cloth dampened with room-temperature water on smooth foliage. Support each leaf while wiping and inspect the underside. For fuzzy leaves, use a soft dry brush. Sturdy plants with many leaves may tolerate a gentle rinse.
How often should I clean indoor plant leaves?
Clean indoor plant leaves when visible dust accumulates. Inspect foliage regularly during routine watering. Dusty rooms may require more frequent cleaning, while plants in cleaner spaces may need little attention. Avoid unnecessary repeated handling of delicate or powder-coated leaves.
How can I make plant leaves shiny naturally?
Remove dust gently with a soft damp cloth and maintain healthy growing conditions. Naturally glossy species, such as rubber plants and ZZ plants, often look shinier once clean. Avoid milk, banana peels, cooking oils, and unnecessary leaf-polish products, which may leave residue or damage sensitive foliage.
Can I use vinegar or dish soap to clean plant leaves?
Plain water is the preferred choice for routine cleaning. Household vinegar can damage sensitive foliage because of its acidity, while ordinary dishwashing liquids are not formulated for plant care. For pest problems, identify the insect and use an appropriate product specifically labelled for the plant and intended purpose.
Why do my plant leaves have white spots after cleaning?
White spots may be mineral deposits from evaporated water, but they can also indicate pests, powdery mildew, or damaged leaf tissue. Examine the texture and location of the marks. Chalky deposits may wipe away gently, while cottony insects, fungal growth, or persistent discoloration require further investigation.
Final Thoughts
Learning how to clean plant leaves safely is one of the simplest ways to improve the appearance of indoor houseplants while giving yourself an opportunity to check their health.
For most smooth-leaved plants, a soft damp cloth and room-temperature water are enough. Delicate, hairy, and powder-coated foliage need gentler methods that respect their natural surface characteristics.
Avoid unnecessary household remedies and harsh polishing products. A naturally glossy leaf does not need an artificial coating, and a naturally matte leaf does not need to be made shiny.
Cleaning should also be considered alongside correct watering, adequate light, suitable humidity, and regular pest inspections.
When you match the method to the plant, you can remove dust without creating unnecessary stress or damage.
For further guidance, explore our indoor lighting guide, complete watering guide, and guide to understanding leaf problems.